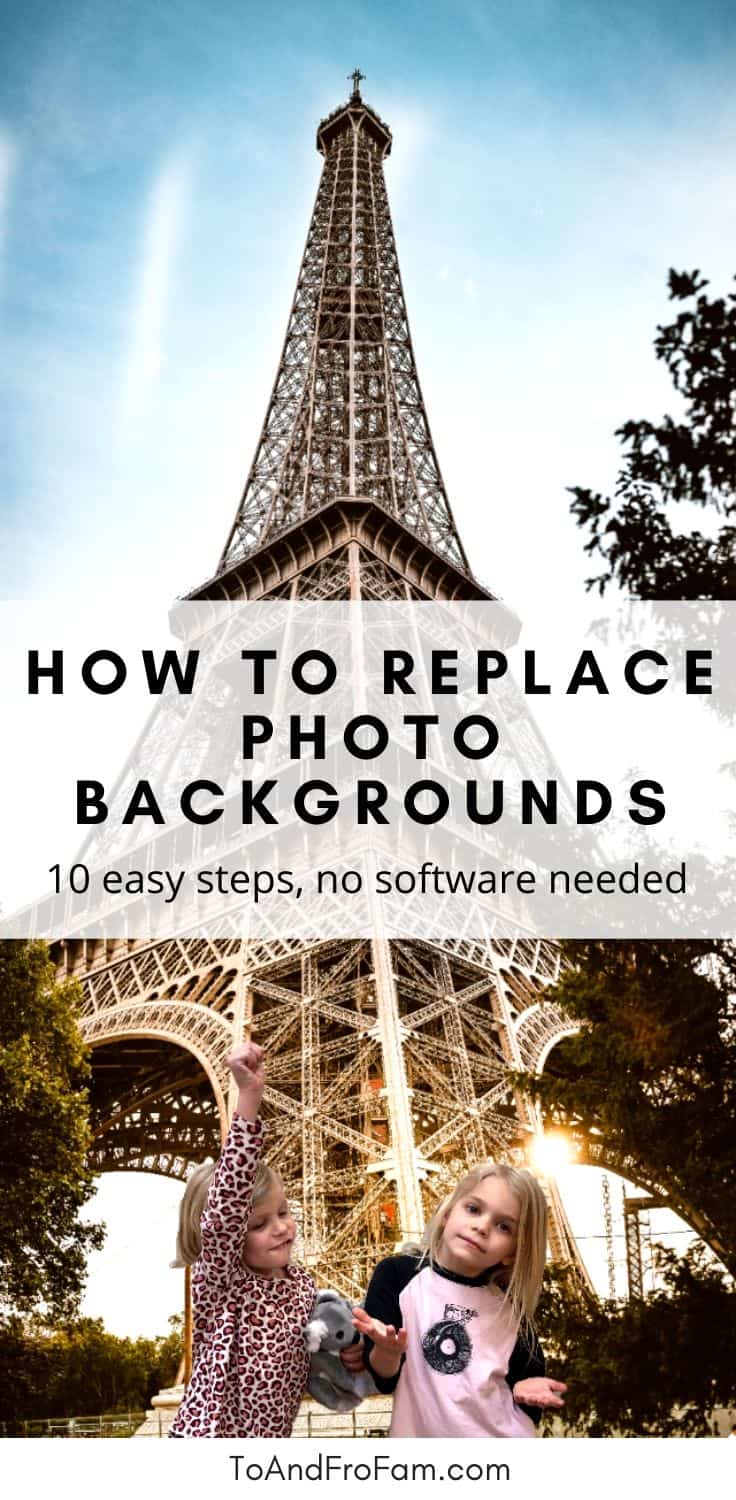
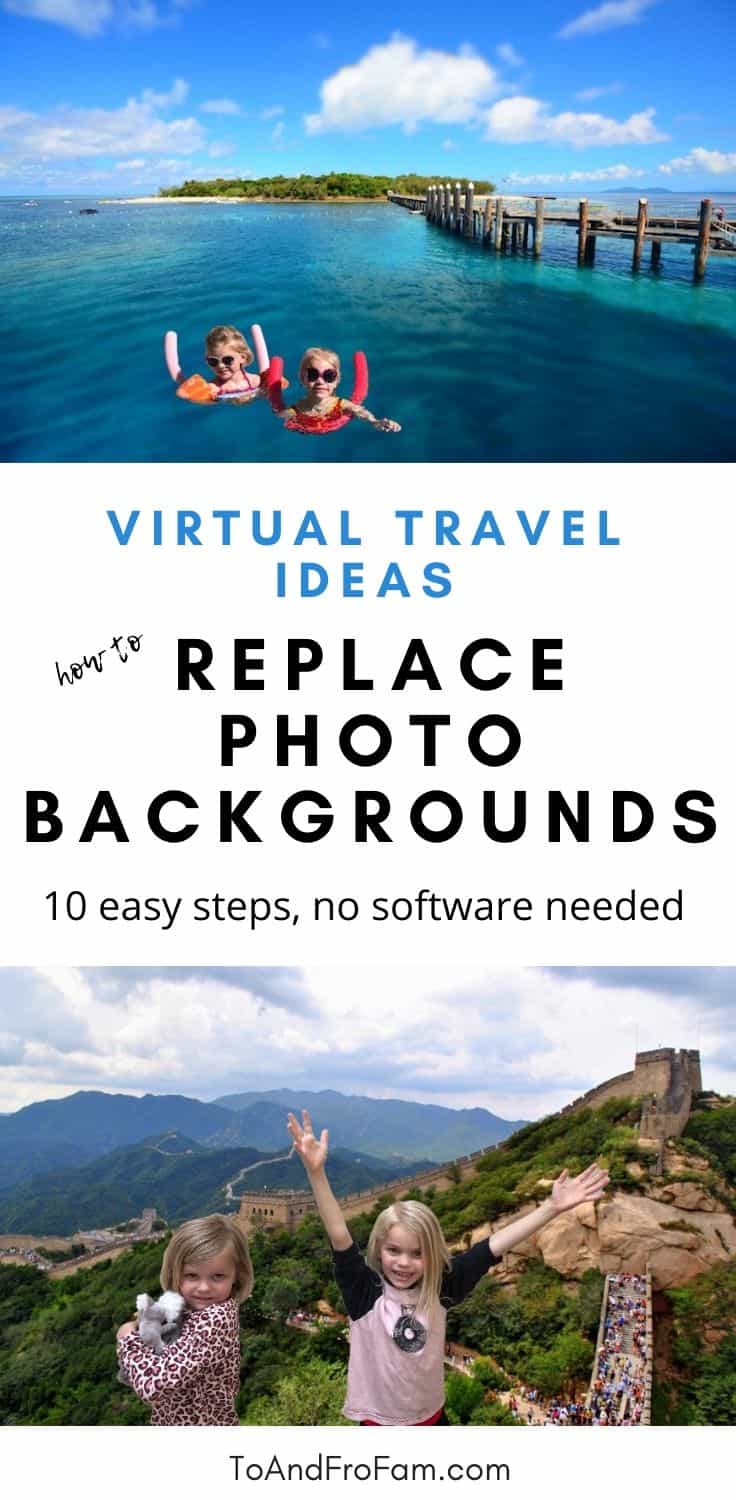
If you’re anything like me, you’re just a *teeny tiny* bit tired of the whole shelter in place mandate. You might be feeling the itch of wanderlust bump up against the realities of a COVID world. Us too. That’s why I’ve been having so much fun doing virtual travel with my kids. To document our “trips,” I’ve been swapping the backgrounds of photos with pictures from the destinations we learn about. Here’s the good news: It’s not hard at all! In this post, I’ll share step-by-step directions of how to replace the background of photos.
These “photoshopped” pictures are a huge hit: My kids love them, I wish I could turn this into a job, and friends are asking me to make them for their kids. I bet you’ll have a blast with replacing backgrounds of photos, too.
And these images make it easy to travel from home in a time we can’t explore like we want to.
Here’s the deal: You can do this digital wizardry with only a few clicks. You don’t need Photoshop or another expensive software. You don’t need any tech skills. Seriously: This takes about 2 minutes to do. And they’re so fun!
Without further delay, here’s your instructions to replace the background in photos in just a few simple steps.
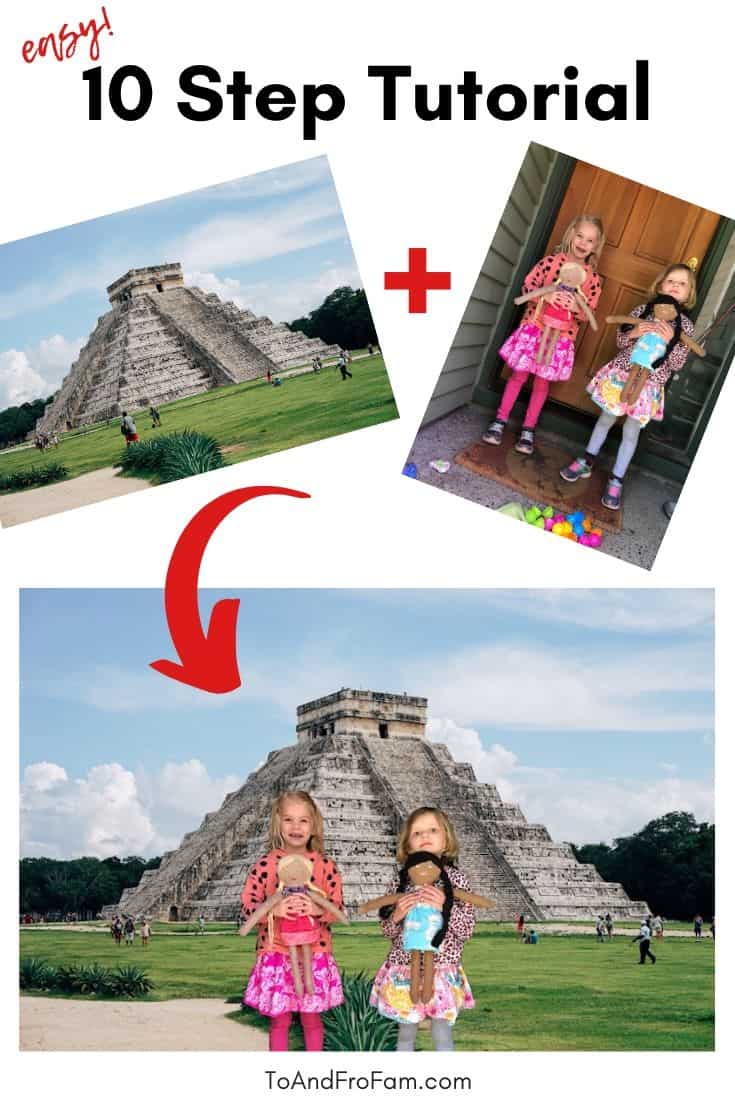
10 steps to replace the background of photos
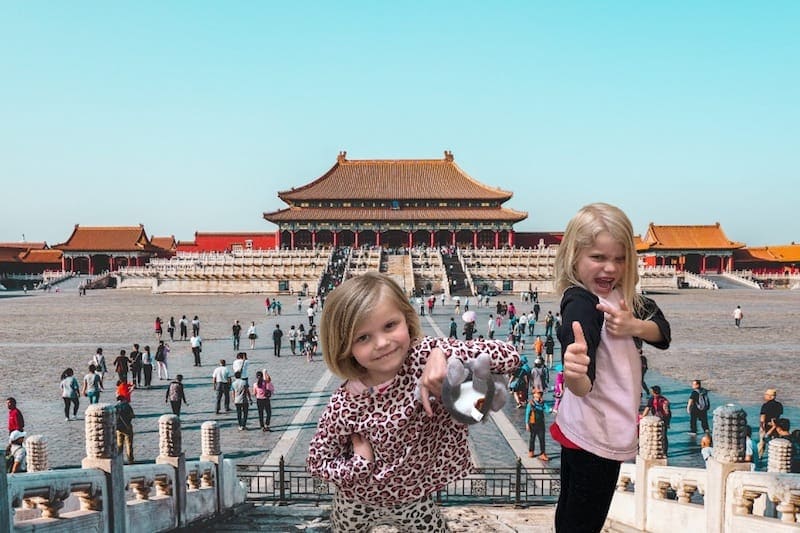
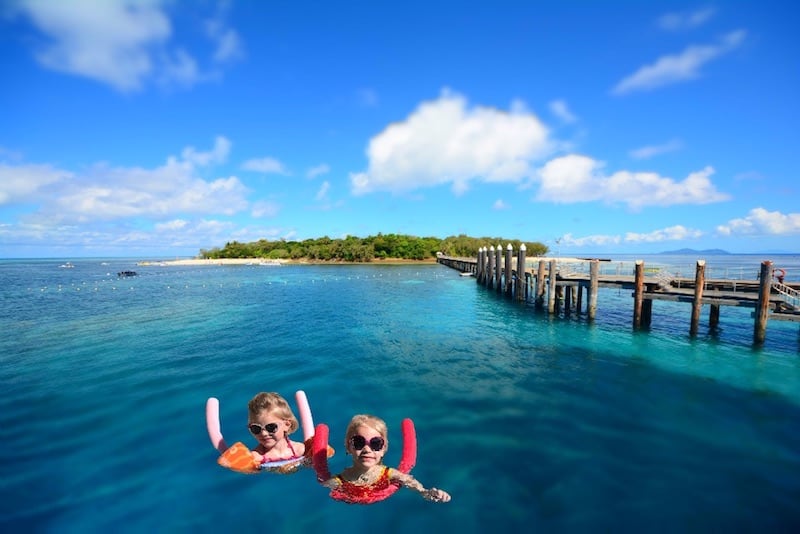
If you could go anywhere in the world right now, where would you go? You don’t need a passport, a plane ticket or an industrial-sized pack of disinfectant wipes to travel now. Simply follow these steps to “photoshop” your family into a scenic photo.
 1. Take a photo
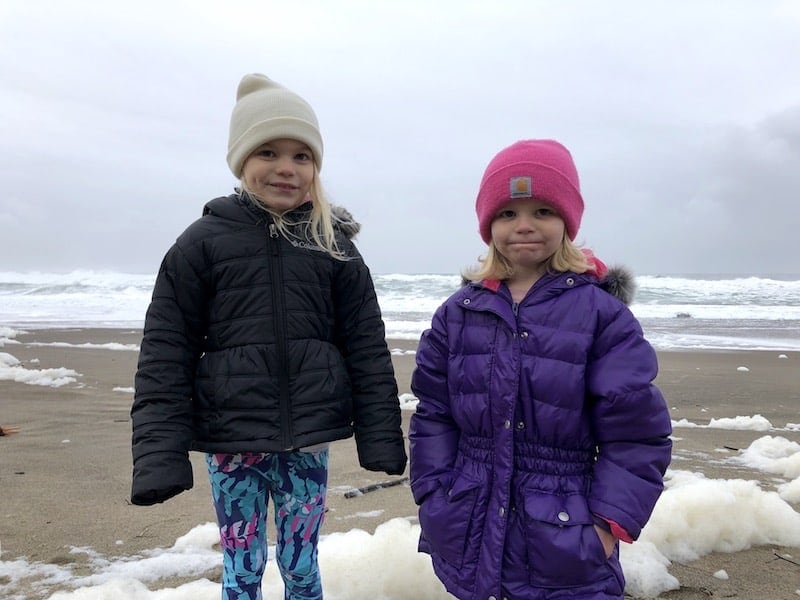
You can either use an existing digital photo or take a new one. This is easiest if the background is plain, but any background or photo will do. Upload the picture to your computer.
For extra fun, you can dress up like you’d need to if you were actually on vacation in your destination.
One final tip: If you’re using a photo of kids, take the photo from your kids’ eye level. If you take it from above, their feet and legs will look strangely small (because of foreshortening). When taken out of context and put into a photo that’s snapped straight-on, your kids’ legs will look weird.
2. Pick a photo of your destination
Next, choose a photo taken in the destination you’d want to visit. You can look online or search through your own photos. My favorite free source of gorgeous stock images is Unsplash.
Simply type the destination name into the search bar and find a photo you like. Download it to your computer.
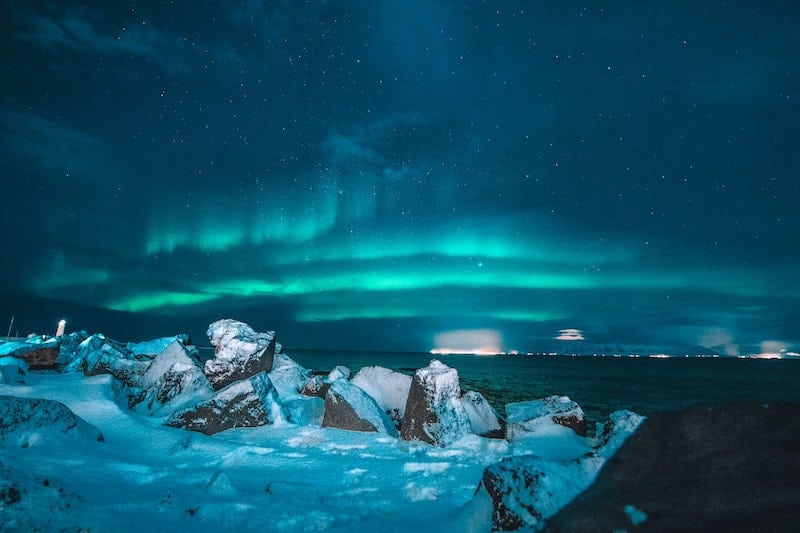
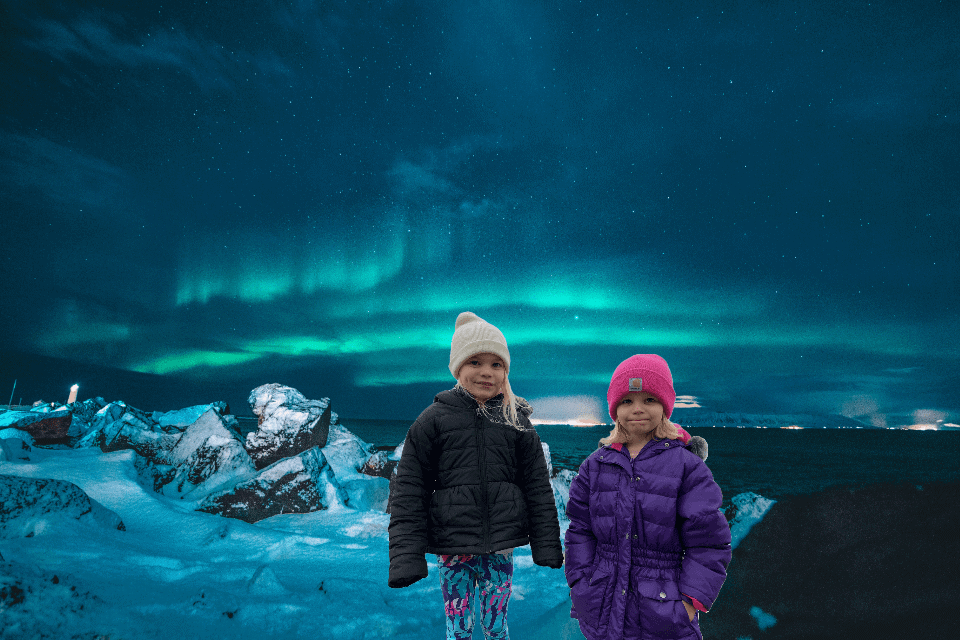
Photo by Nicolas J Leclercq on Unsplash
I found this one of the Northern Lights in Iceland from Nicolas Leclerq.
3. Upload photo
Go to the free Photo Scissors website. Click the button that says “Upload Photo.” Select the image of you/your family.
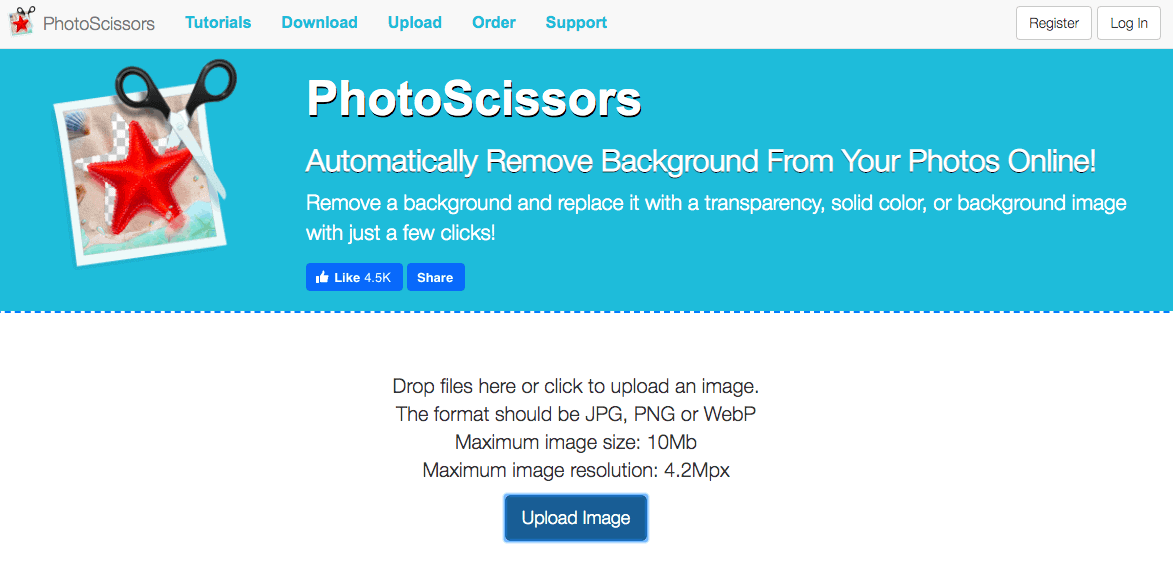 It will automatically load to the next step.
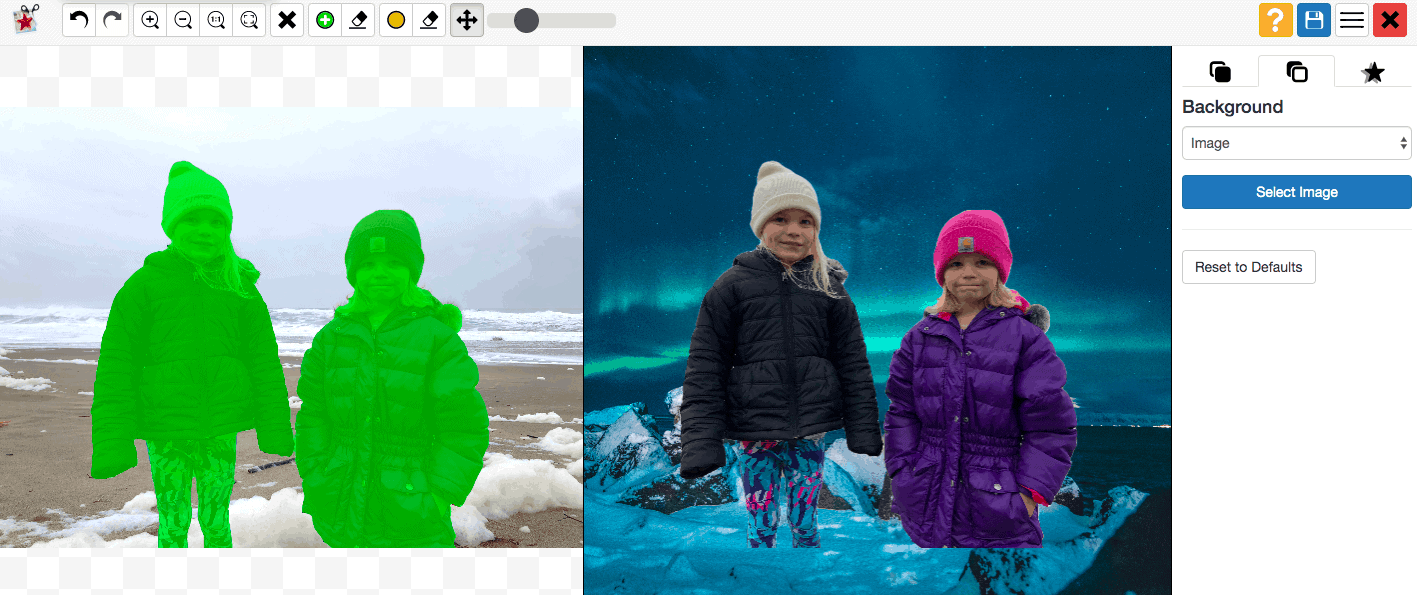
4. Check the foreground
Photo Scissors will automatically select the foreground, aka the subject of the photo—in this case, the people you want to transport to a distant land! It automatically removes the background, leaving the selected part of the photo highlighted in green.
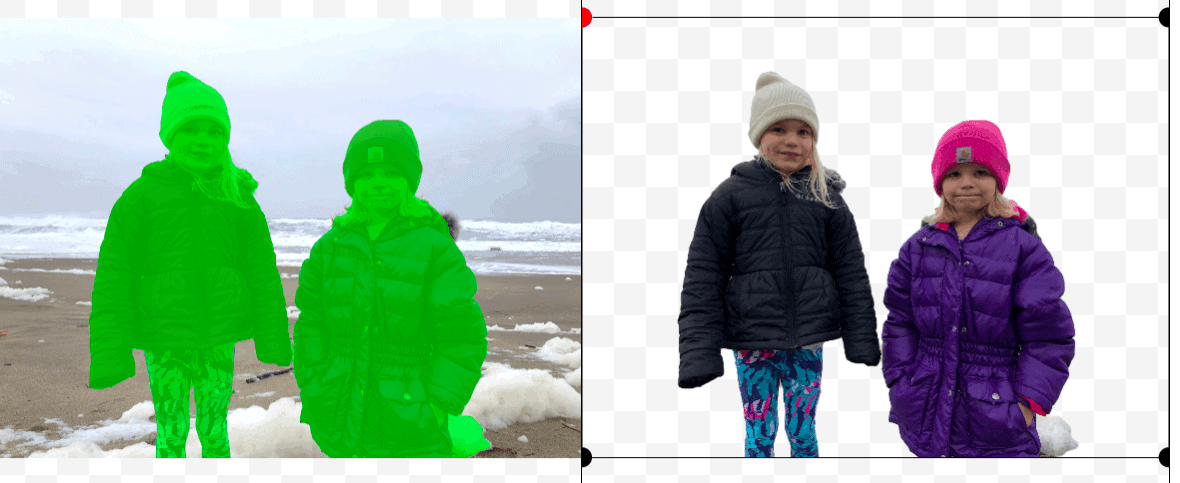
Generally, it does a good job of automatically selecting all—or nearly all—of the parts you want to keep in the photo.
Look at the image on the right to see if there are more parts of the picture you want to remove, or parts you want to add back in.
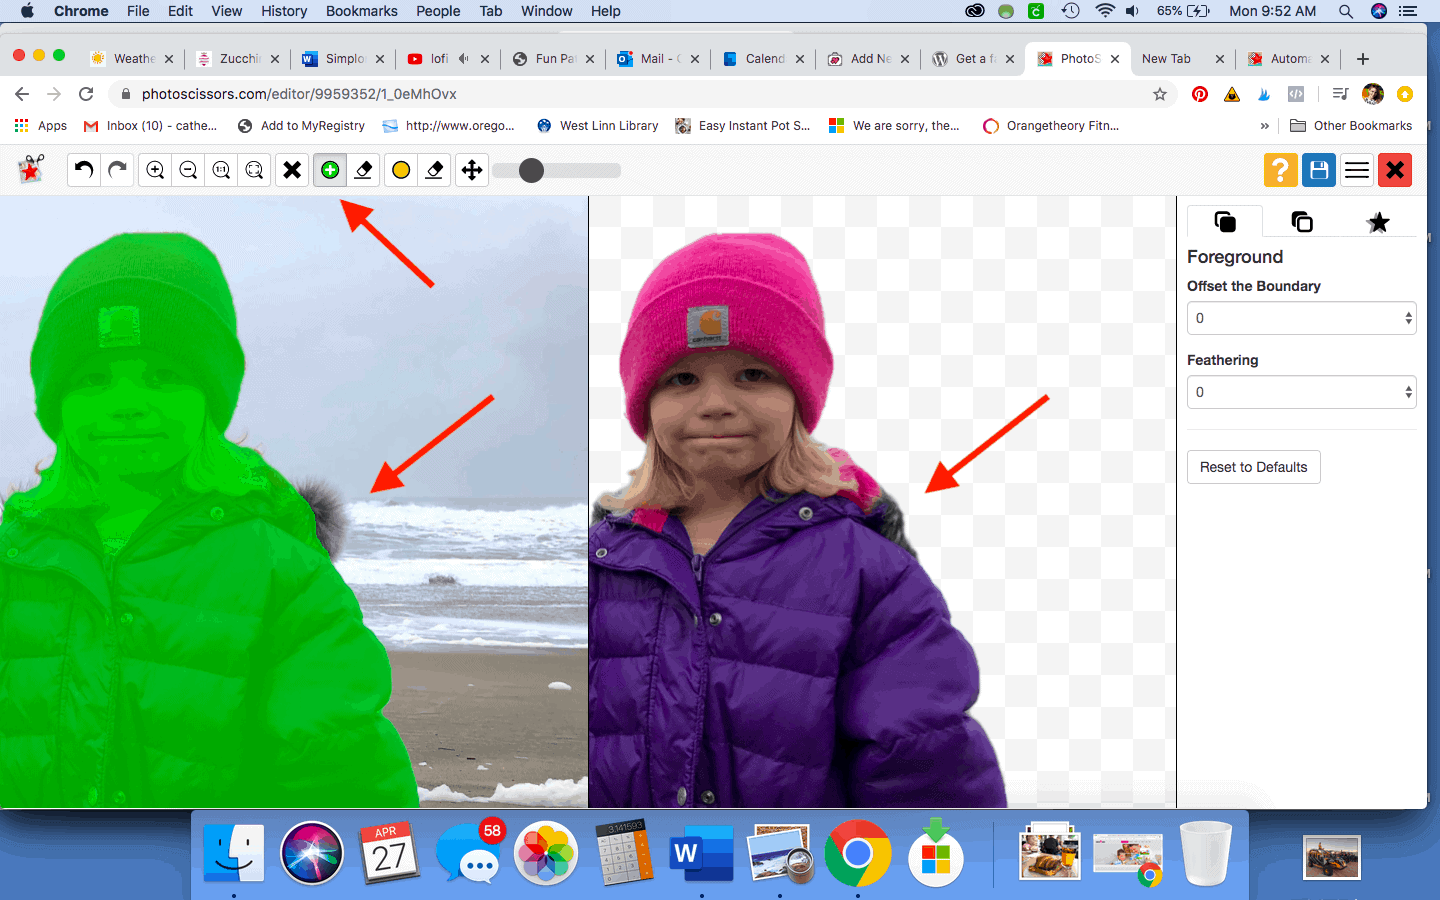
5. Remove unwanted parts
Select the eraser tool, which is immediately to the right of the green plus icon. This will remove unwanted parts of the photo.
Slide the black dot over the bar to get the size eraser you need. You may need to make it smaller than its default.
Then hold down a click and move your mouse to draw over the unwanted parts of the selected foreground. You can see it disappear from the background-less photo on the right.

For more detailed removal of unwanted photo parts, zoom into the image. Click the icon of the magnifying glass with a plus in it. Then click the icon with the four arrows. Click and drag to move the photo until you see the section you want to adjust.
6. Add in missing parts
Next, take a close look to see if the tool automatically took away parts of your photo you want to include. Click on the icon with the arrow in the green circle. Hold down a click and move your mouse to draw over the parts of the picture you do want. As you draw, you can see those sections get added back in on the right.
If you need to see more closely, follow the same instructions in step 5.
Hooray! Now you’re ready to replace the background of your photo!
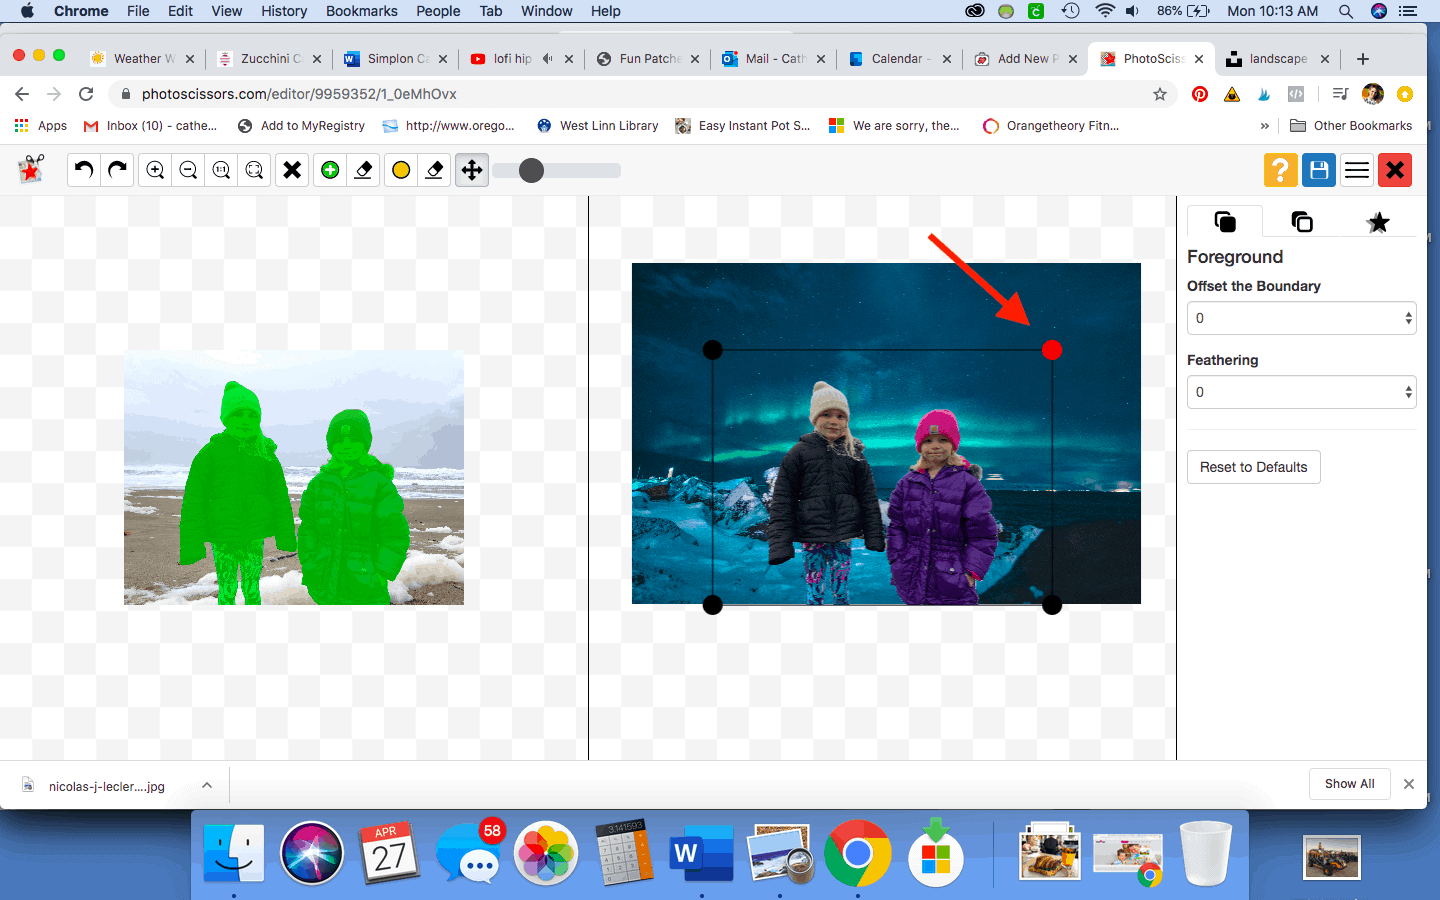
7. Replace the background of the photo
On the far upper right of the screen, you’ll see icons with two squares. Up until this point, you’ve been using the icon with the dark square in front—the foreground setting. For the next step, click the icon beside that one. It has two squares with the dark one behind the light one.
Under “Background,” you’ll see a drop-down menu. Its default is “transparent.” But you don’t want to travel to nothingness! Click the dropdown menu and select “Image.” Then click the blue “Select Image” button and choose the image of your destination from your computer. It will pop up behind the people!
8. Adjust the background of the photo as needed
Chances are, your original image won’t perfectly fit into the background automatically.
(ACK, my kids’ legs have been chopped off!!!!)
To see exactly what you’re working with, click the icon of the microscope with the minus in it to zoom out. Drag the background until it’s in a good position relative to the foreground.
Note: If you want to drag the foreground—the people—simply select the icon with the dark square on top. Then you’ll be able to move the foreground.
9. Adjust the size of the photo
Your original image may look to big or too small relative to the background. You can easily shrink or expand it.
Click on the foreground icon (the one with the dark square on top). Click and hold one of the back dots at the corners of the rectangle surrounding the foreground image. Drag to make it smaller or bigger.
It’s ok if part of the foreground goes beyond the edge of the background image. It will be cropped out.
10. Save your “photoshopped” image
Once you have the image just how you want it, it’s time to save. Click the blue icon of the floppy disk in the top right corner of the screen. (Do you remember floppy disks? I sure do!)
Here you have two choices. You can either register and pay for a high-resolution file or do the free version. You only need the high-resolution image if you plan to print it. If you intend to use it digitally—sharing on social media, for example—the low resolution version is just fine!
Congrats—you replaced the background of a photo in just a few easy steps! I told you it wasn’t hard. 🙂
Travel from home
On a more serious note, I’ve been struggling with the quarantine. (Duh—I know we all are—but hear me out.) We have it good compared to so many people. Yet travel is my favorite thing to do. It lights me up inside, makes me feel like I’m filled with fizzy champagne inside. I’m happiest and most alive when I’m exploring an unfamiliar place, learning about another culture and seeing the world anew from my kids’ perspective.
I don’t know when I’ll be able to do that again.

Today looks drastically different than a few months ago. Back in January, I had trips planned to China, Taiwan, Ethiopia, Japan, Denver, San Diego, Bend, OR and more. Now my calendar is filled with scribbled-out plans.
Some days I’m really sad. I’m mourning everything that has changed, including my family’s love of travel. We don’t yet know how everything will shake out and when we’ll be able to return to nearby road trips, let alone international jaunts.
In response, I’ve been leaning into anything that makes us laugh and brings us joy. If you follow me on Instagram, you’ll see that we’ve been getting wacky on the regular. We’ve been doing all the activities I wrote about in my post on social distancing fun for kids.
Replacing the backgrounds on photos is one of those things that makes us giggle uncontrollably.
I’m guessing this easy activity will bring you joy, too. When you make your own, post them on social media and tag me (@toandfrofam) so I can see where you traveled!
Question: Where will you go first during your virtual travel from home? And where will you go first when we get to travel again for real?


That’s so easy! I love that’s it’s free!
Me too! You can do the same in Photoshop, but that costs quite a lot of money per month, and you have to learn to use the tool. This way is so much easier.
Thanks for this really helpful tutorial! This is something fun to do that will keep us from getting bored at home.
We could all use extra ideas to keep things fresh and interesting at home. 😉
Great tips and it looks awesome! Will have to play around and try this:)
Have fun, Yana! Let me know how your photo editing goes.
Now, I can edit my own photos. Thanks for your useful guide.
You’re welcome Arris. I hope you have fun editing your photos.
What a cool idea! And your tips make it look so easy. Can’t wait to try this out!
I’d love to see your photos when you’re done replacing backgrounds, Erin! Tag me on social when you make ’em. 🙂
I love the pics you edited here! What a fun and free photo editing option!
It’s so great! Def not as professional as Photoshop, but like you said it’s free – and you don’t have to learn a whole new program.
Wow, this is a cool idea. The perfect trick for making catchy video thumbnail!
Ooh I hadn’t thought of that but great idea!
What a cute and fun way to edit photos. Even putting your kids in different cities. This would be nice for Xmas cards!
Oh my goodness that’s such a great idea!!! I may totally use these as Christmas cards. Thanks for the idea! 🙂
I will be using this at home. we always need fresh ideas at this time. Thanks for sharing!
You’re welcome! We ALL need fresh ideas to keep ourselves (and our kids) entertained during lockdown.
So cool! I can’t wait to show my kids this!
Let me know if you and your kiddos end up making some too! If you do tag me on Instagram when you share them – I’d love to see!!!
ahahaaa I love this! They look so damn cute in all of these photos! 😀
Haha thanks! They’re absolute goofballs 😉
Such a fun idea! A great way to keep wanderlust alive when we are at home or in between trips.
Thanks Keri! We all have so much fun with these “photoshopped” photos.