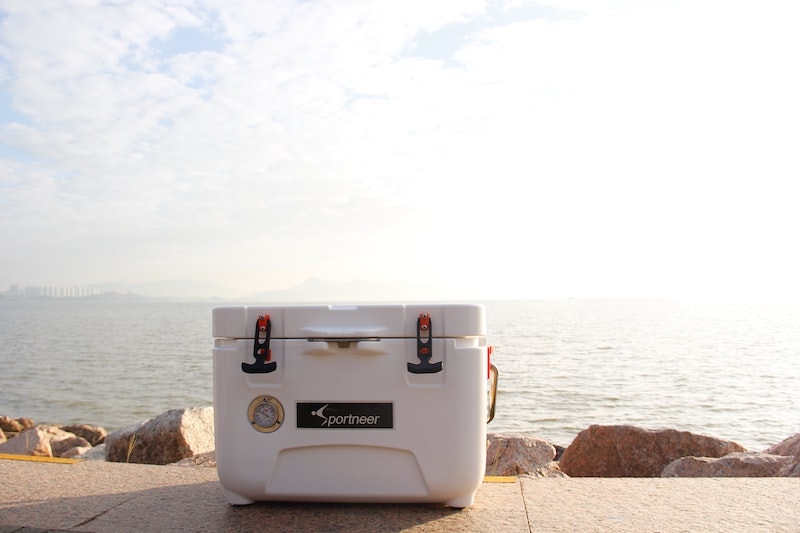
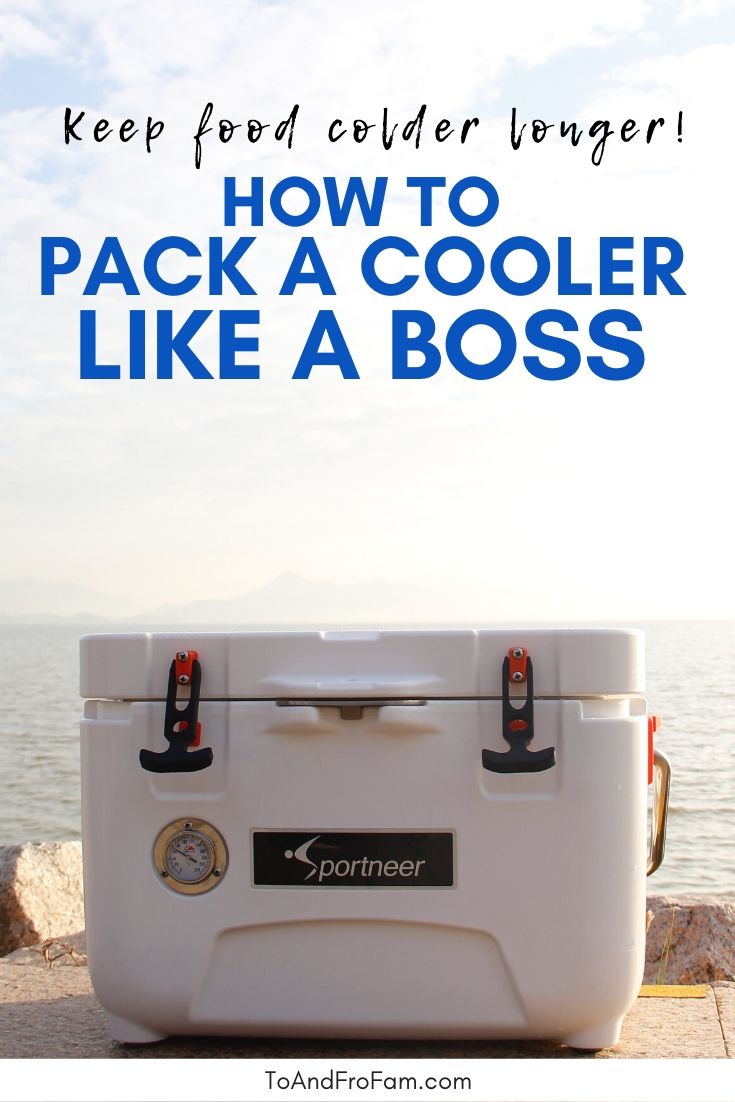
When my family goes out of town, my husband is the one who Tetris-es all our gear into the back of the minivan. I have given up on contributing because he takes out and rearranges everything I put in. But packing a cooler? That, my friends, is my domain. As a certified cooler packing expert, I’m excited to share how to pack a cooler for camping, road trips, beach trips or beyond!
This post contains affiliate links. By clicking and buying, you help me earn a small income (at no extra cost to you!) so I can continue bringing you free travel content.
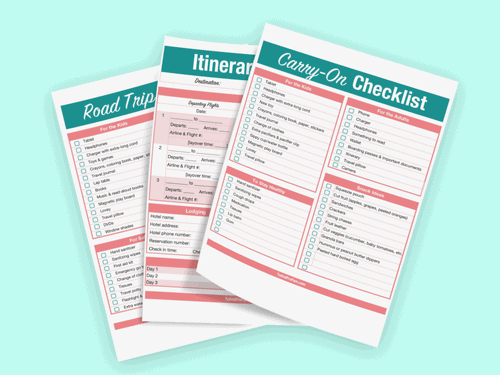
But before I reveal all my pro cooler packing hacks, I have a question: Have you gotten a copy of my book yet? Road Trip Games & Activities for Kids shares 33 fun, customizable games and free printables that will keep you entertained on the road. Click the image below to get your copy in e-book or paperback!
Why is packing a cooler important?
Keeping foods colder longer is important whether you’re camping, road tripping or just going out for the day. Of course you probably agree that food and drinks just taste better when they’re cold. In addition, here are the actually important reasons to pack a cooler right:
- Properly packing a cooler ensures food stays colder—and therefore safer. Temperature fluctuations create an environment where bacteria and other baddies can grow.
- Cooler organization helps you find everything faster. I think you’ll agree that rummaging around in a cooler—scraping your knuckles on ice cubes, even—is no fun.
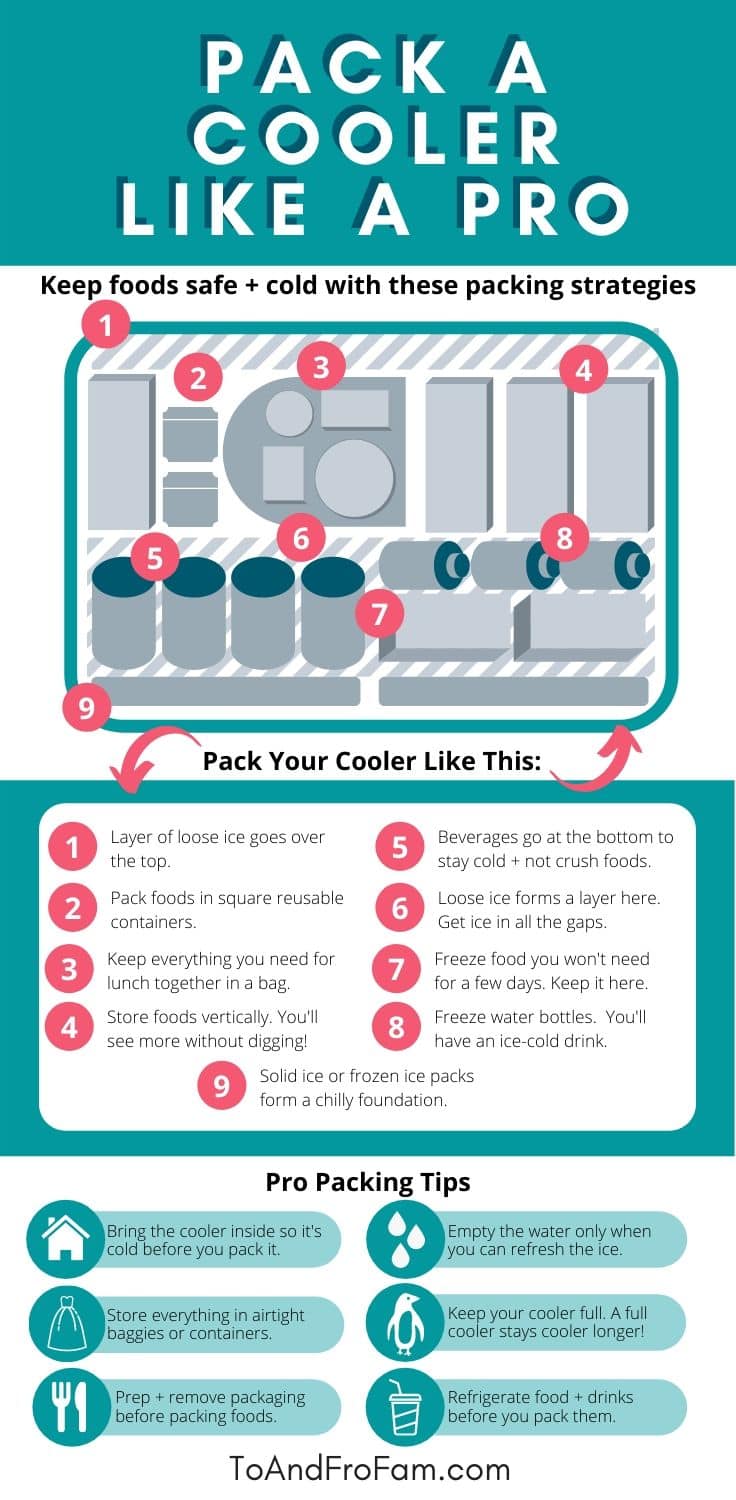
Friends, I totally geeked out on this post on how to pack a cooler. Yep, that’s right—I made an infographic. I’m a visual learner, and you might be too.
And, at the very least, Hubs can use the below diagram if he ever has to pack the cooler without me. 😉
How to pack a cooler—the smart, organized way
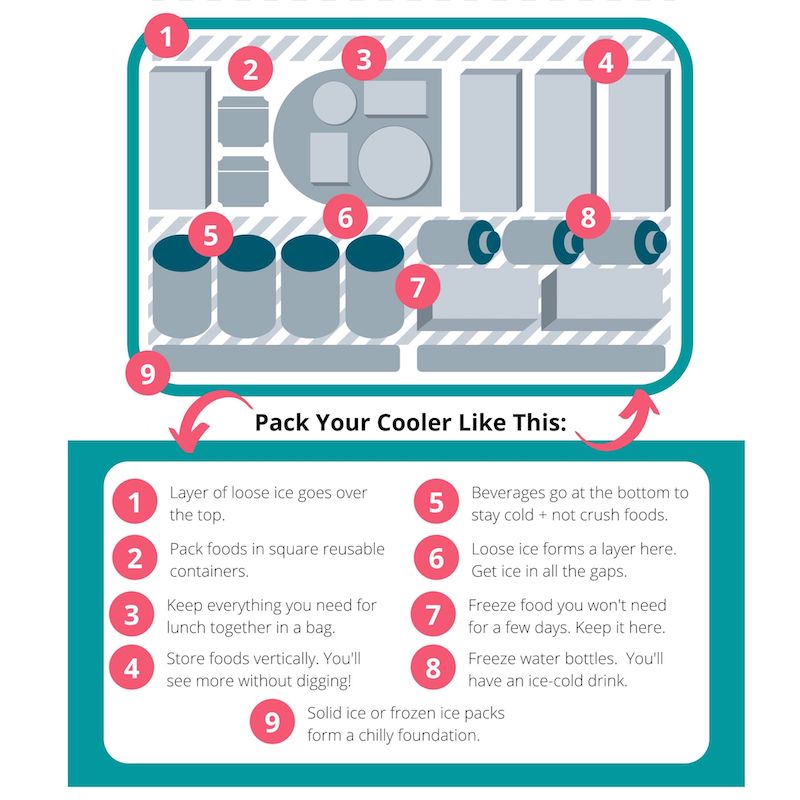
1. Loose ice on top.
This top layer is like icing: It finishes off packing a cooler by ensuring every square inch of the cooler is primed to stay cold. Leaving unused space will make everything inside the cooler heat up more quickly, since air gets warmer more quickly than water or ice does.
You’ll also pack the densest ice on the bottom of your cooler, so this top layer ensures food near the top stays cold, too.
2. Use square reusable containers.
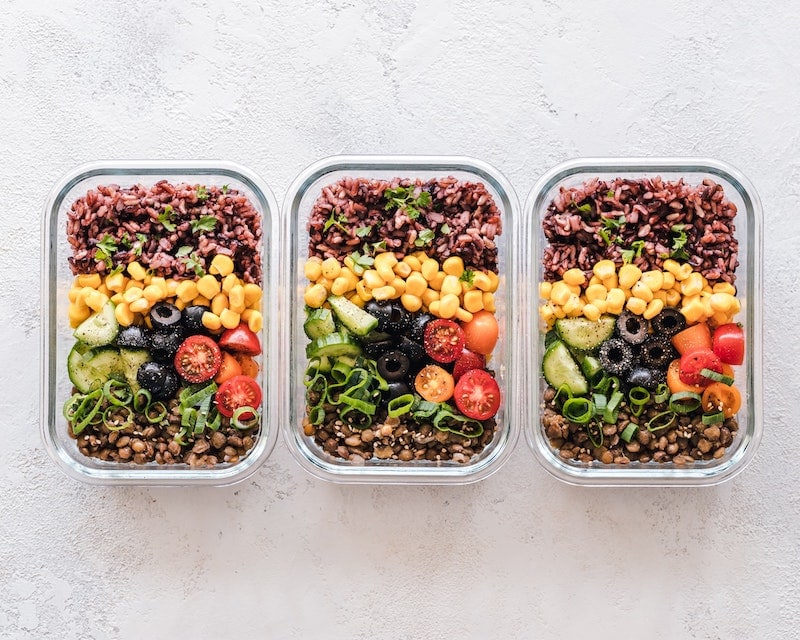
I’m a big fan of bringing prepped food camping and on road trips. That way I don’t have to break out the cutting board and knife if I want to slice some peppers for lunch or chop a bunch of veggies for a foil dinner.
I put all that prepped food in reusable containers—but use square ones! Round containers take up more space and don’t pack together efficiently. You’ll use valuable cooler real estate unless you stick to square and rectangular containers.
3. Gather lunch supplies in a bag.
Fill a zippered plastic bag with everything you’ll need for your first meal while camping or on a road trip.
I’m guessing you’re like me, and that when you get to camp or hit the road, you have plenty of other things to do besides rummage around a cooler. So stash everything for that meal in one place. You won’t get hangry—and you won’t keep the cooler open longer than necessary. That’s a good thing for the longevity of your ice!
4. Store foods vertically.
Can you tell I heart Marie Kondo? If you’ve read her blockbuster book on organizing or watched her Netflix show, you know she’s a fanatic in storing clothing vertically. I’m the same, except for food. Whether I’m packing a cooler or storing dry goods for a long road trip, I try to keep everything stacked vertically—not horizontally.
Why?
When you pack items vertically, you can see more at a glance. You won’t have to dig through layers of ice and food to get the one thing at the very bottom.
5. Beverages at the bottom.
Pack your La Croix, beer or pop at the bottom of your cooler. You don’t want your drinks crushing the rest of your food!
If you have the space, though, pack a separate, smaller cooler just for drinks. I like this drinks cooler for a few reasons: a) It can store more than three dozen drinks. So when you refrigerate all those drinks before you leave on your trip, they’ll help keep each other cold. b) This cooler is collapsible. So when you near the end of your trip and have eaten most of your food, you can fold down the drinks cooler and combine everything in the main cooler.
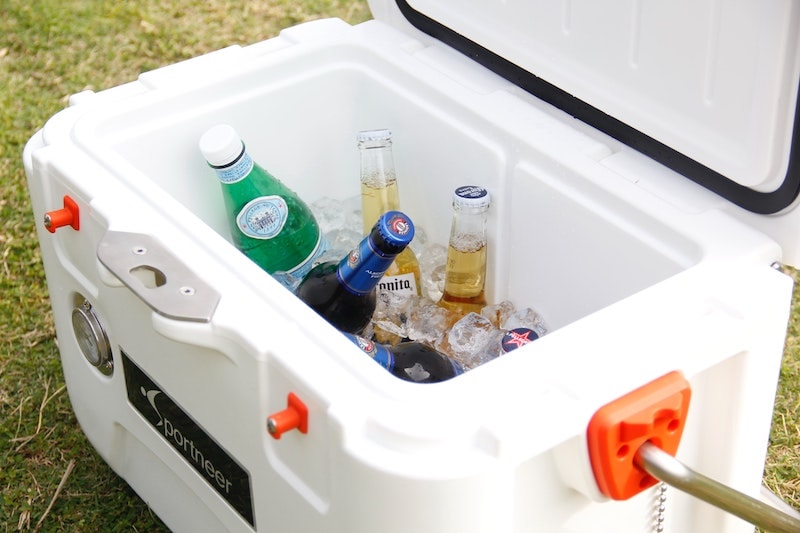
6. Loose ice fills the gaps.
Think of a perfectly packed cooler like a cake: It has layers and makes for a delicious outing. In this case, loose ice is the frosting between two layers of cake.
You cover the bottom layer of the cooler in ice for two reasons:
- A layer of loose ice ensures all of the foods stay cold and safe, not just those at the bottom and top.
- Loose ice fills gaps in between food items. Pockets of air stay warmer, melting the ice more quickly.
7. Freeze food you don’t need immediately.
If you’re packing a cooler for more than a few days, there will be ingredients you won’t need until later in your trip. When possible, freeze these items and use them as a solid ice layer.
So if, for example, you’re planning chicken sausages for dinner on night 3, freeze them. The frozen food will help keep the entire cooler cold; the frozen food will stay fresher; and the frozen food will thaw by the time you’re ready to eat it.
8. Freeze water bottles.
My kids don’t just ask for water when they’re thirsty. Max and Edie routinely request “ice cold water.” Unfortunately, camping and road trips make fulfilling that request a lot harder than it is at home.
But! That’s why I love this trick. Instead of buying a bunch of ice packs, we freeze bottles of water instead. Just leave some room for the ice to expand.
Fiji water bottles are rectangular and so work best, but any water bottle will do.
A few days into your camping trip or road trip, the bottles of water will have thawed. Then you and your whole crew can enjoy ice cold water!
9. Solid ice forms a foundation.
At the very base of your cooler, pack a layer of solid ice.
We reuse the ice packs we receive with meal delivery services. (We order a few times a month from Freshly, which delivers fully cooked and ready to heat gluten-free meals. Here is a link if you want to try Freshly and get $40 off.)
Solid ice is important here because it melts more slowly than loose ice. As a result, it’ll help keep the entire cooler cold for longer.
These tips will work in any kind of trip, whether you’re packing a cooler for camping, a road trip, a beach day or anything else.
Read on for situation-specific tips on packing a cooler the right way.
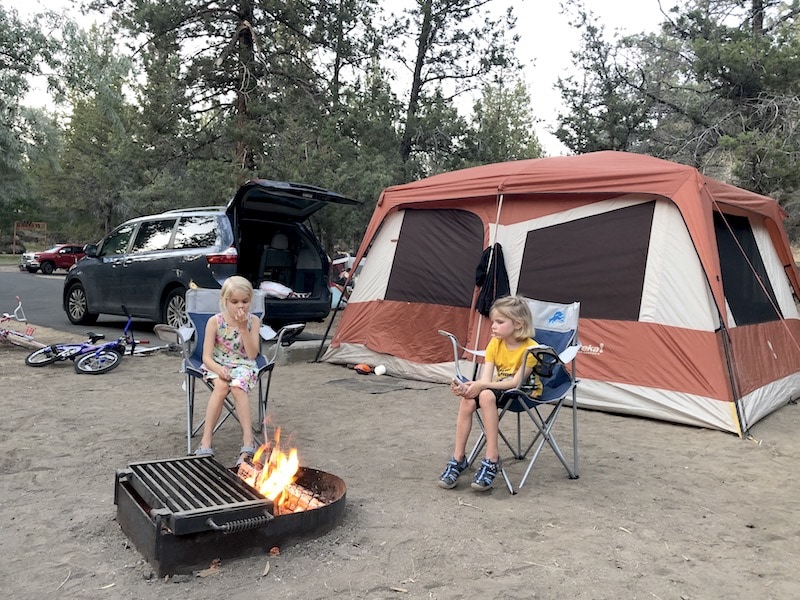
How to pack a cooler for camping
I’m channeling all my stir craziness into camping—so my family and I are doing a lot of camping during this COVID summer. As a result, I’ve had some extra opportunities to learn even more cooler packing strategies. And I’m here to teach you how to pack a cooler for camping specifically.
You’ll want to follow all the above steps and organization rules.
In addition, you’ll want to find a shady place to stash your cooler once you arrive at your campsite. Under a picnic table or under trees tends to work well.
If you can’t store your cooler in the shade, at least use a reflective shade or cover. Reflective shades bounce 70% or more of sunlight away from your cooler, helping preserve the ice and food inside. This is especially important if you don’t have easy access to ice when you’re camping.
Plus, the reflective shade kind of makes it look like you’re futuristic aliens who like to camp.
Finally, you’ll want to safely store your cooler at night. Food left outside can attract critters from ground squirrels to bears. I’m pretty sure you don’t want to share your food with wild animals.
If you’re car camping, stash the cooler in the car or its trunk. If you’re in bear country, store all food in a bear box elevated off the ground.
Take it from a gal who once woke up in a tent to the sound of a skunk snacking on our food, which we unwisely/drunkenly left out overnight.
How to pack a cooler for a road trip
Yes, I know that you might be taking a road trip to go camping. If that’s the case, all these tips and strategies apply! Here are the cooler packing ideas specific to a road trip.
As you pack all your gear in the car, pack the empty cooler, too. That way you know you have a perfectly cooler-shaped spot available for when you add all your food.
Packing a cooler should be an almost-last thing to do before you leave. (If you’re tired of forgetting things, you’ll appreciate the full pre-trip checklist I created.) That way, the food stays cooler longer.
Then the cooler is the very last thing to pack in the car—besides your crew, that is!
When the cooler is right next to the hatch or trunk, it’s easily accessible whenever you stop on your road trip. You definitely don’t want to have to unearth the cooler from a mountain of other gear!
Last tip: When possible, pack your cooler in the main part of the car, not the trunk. This tip isn’t relevant to those of us with a minivan. But if you drive a sedan, you probably noticed that the trunk heats up in the summer! You want to protect your cooler, and the food inside, from such extreme temperatures.
Should I drain the water from a cooler?
This question has experts and even scientists arguing over who is right. But when it comes to whether you should drain the water from a cooler, the answer is: it depends.
When you should not drain the water from a cooler
Much of the time, you don’t want to drain the water from a cooler. That’s because the melted ice is still colder than the air that would replace the space water had formerly taken up. So if you let out a gallon of melted ice water, the equivalent of a gallon of air will now be in your cooler instead.
Not good if you want to keep cold foods colder.
When you should drain the water from a cooler
A couple of exceptions from the general rule of letting the water chill out in the cooler:
- If you still have lots of solid or loose ice, drain the water from a cooler. This is because water causes the remaining ice to melt more quickly. So to preserve the ice you have, empty your cooler.
- Right before you add fresh ice, drain the water from your cooler. If you have access to fresh ice, make sure you’re not adding it to a melty ice water soup. It’ll stay colder longer.
- Drain the cooler water before you have to move it. If you’re lugging the cooler around, leaving the melted ice water inside makes it heavy. Save your back; drain the water.
- If anything spills in the cooler, drain the water. You don’t want food sitting in a cocktail of water and salsa. Yuck.
This happened recently on our camping trip in Central Oregon: I brought along a can of whipped cream, thinking it would be a nice treat for Max and Edie. I didn’t realize the dang whipped cream would squirt every time anyone bumped it, so we ended up with whipped cream water all over everything.
You didn’t realize there was so much to correctly packing a cooler, did you? Now I bet you understand why Hubs leaves it to me. 😉
Read the how-to instructions below for a quick recap.
How to Pack a Cooler for Camping + Road Trips
If you want to keep your food colder, fresher and safer for longer, you need to pack your cooler correctly. Here, I'll share step by step how to pack a cooler for camping, road trips, beach trips or any other adventures.
Materials
- Good quality cooler
- Ice packs
- Frozen water bottles
- Ice
Tools
- Freezer
Instructions
- The day before your trip, freeze any ice packs or water bottles you'll use in the cooler.
- Also the day before your trip, bring your cooler inside, especially if you store it in a hot attic or garage. It will reach room temperature and keep the cold foods colder.
- The day of your trip, lay solid ice blocks or frozen ice packs on the bottom of the cooler. This is your foundation.
- Add frozen food you won't need for several days.
- Drinks also go at the bottom so they don't crush other food.
- Top the drinks and frozen food with a layer of loose ice, fitting ice into any gaps between foods.
- Load already prepped food in rectangular storage containers.
- Pack food vertically instead of horizontally. You'll see more without digging through the cooler.
- Load more delicate foods, such as produce, at the top.
- Cover everything with a layer of loose ice. Make sure the cooler is completely full, as this helps it stay colder for longer.
Recommended Products
As an Amazon Associate and member of other affiliate programs, I earn from qualifying purchases.


This post is so useful!! So many tips and tricks I wouldn’t have thought of before. Thank you!
Oh I’m beyond glad this post was helpful! That’s my goal. 🙂
It feels like some of these should have been obvious to me but I had more than one a-ha moment while reading this. Frozen food and drinks. So simple but makes so much sense
I’m beyond excited you had a few a-ha moments! Freezing the food you won’t use for a few days takes a bit of forethought and meal planning but is well worth it.
Great details! I didn’t realize how much better I could pack my cooler. Now I know, thanks for the great post.
You’re welcome Ashley! Let me know if you become your family’s Master Cooler Packer 😉
Great tips! It seems so obvious but I always get struggled when I need to organize it.
It’s not obvious at all! I came to this cooler organizing strategy after much trial + error, plus research on my own.
Wow, I had no idea there was a winning strategy behind packing a cooler but I feel you’ve nailed it! I’d probably just throw everything in and hope for the best! To be honest, we’ve not travelled with a cooler before but thanks to COVID it’s going to be a really handy addition to our upcoming travels. I’m feeling inspired by your post to try one out on our next trip we have planned. Thanks for the great guide, I’ll be coming back to it to assist with my future cooler packing!
Yep – the COVID summer is the best time to get comfortable with road trips (and packing a cooler!). I’m so glad these cooler packing instructions helped!
These are such great tips and tricks!! We have been doing quite a few road trips this summer and this will definitely come in handy for our next adventure!
You and me both Kelsey! Road trips are the best sort of travel for many of us right now.
Awesome tips and I think this will come in handy for lots of people this summer who are all staying close to home, but want to get away still 🙂
Oh totally. Many of us want to get out and enjoy the summer but also respect social distancing. Road trips and camping can be a great way to do that!
Fantastic resource! So often I’ll get somewhere and everything will be soggy! Thanks for the tips and tricks for keeping everything cool!
Soggy food on a road trip is awful. Ugh. Once I went on an extended kayaking trip only to discover all our sandwiches had gotten wet. I definitely learned from that mistake!
Wow I never put that much thought into this but a lot of the tips make sense! I love your infographic image (I think that’s what it’s called). Great post, lots of detailS!
I’m so glad you liked the infographic, Amber! I admit I sometimes geek out on things like how to pack a cooler – but I’m just glad the tips are helpful!
This is handy! Some I already knew about but some tips I did not. Thanks!
Oh, I’d love to hear which cooler packing tips were new to you.
Those are great organizing tips!
Thank you! I just love helping readers make travel easier.
this is great information! I really needed it!
So glad you liked the tips to pack your cooler, Kimberly!
I will definitely use these tips next time we are going on a camping trip..
Terrific, Ann! Happy camping 🙂
These are some really good tips. When I used to pack our cold box on our boat, instead of putting ice on the bottom, I would put frozen lasagne. It would be our last meal and would provide cold for the entire icebox as well as defrost by the time we needed it.
That is brilliant!!! Did you keep the lasagna in a sealed bag so it didn’t get wet?
I love the organisation of this !
I’m a sucker for well organized things. 🙂
You literally sat out so well how to pack a cooler, there is no way I can fail. Coolers are especially helpful when packing for road trips.
I’m so glad you found the cooler tips helpful, Caressa!
Wow! I actually didn’t realize there was so much behind packing a cooler! I don’t usually take one on trips just because I’m scared we’ll be left with melted ice and I won’t be able to manage it properly. Most of the time, we are able to buy cool drinks and food when we want because we hardly go camping.
But, definitely using these tips the next time we camp!
Isn’t it funny how many details go into something as simple as loading a cooler?? You definitely don’t want a pool of lukewarm water at the end of the day! Glad these tips help for your next camping trip.